SureSync Schedulers are managed through the Scheduler Servers window that is accessed by clicking on the "Home" button and then selecting "Scheduler Services."
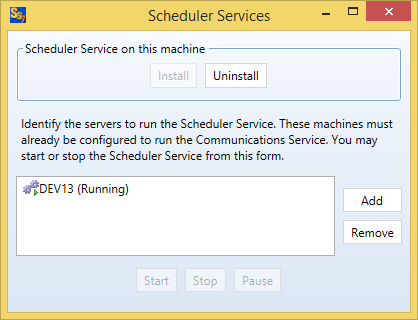
A Scheduler can be installed or uninstalled by clicking on the 'Install' and 'Uninstall' buttons. Please see Installing the Scheduler for more information. This installs the SureSync Scheduler on the local machine that SureSync is installed on. For details on running multiple Schedulers please see Using Multiple Schedulers.
A Scheduler can be stopped and started by selecting the Scheduler from the list and clicking on either the 'Start', 'Stop', or 'Pause' buttons.
A Scheduler can be added or removed to the machine's SureSync installation by clicking on the 'Add' or 'Remove' buttons. This is different than installing or uninstalling a Scheduler service. For example, you might have two Schedulers already installed on remote machines and want to add them to this SureSync installation so they can be used to start jobs. In that case you would use 'Add' to add the existing Scheduler to this SureSync installation. If you then wanted to eliminate one of those two Schedulers from being used on this machine but still wanted it to be available to other machines you would select the Scheduler and click 'Remove'.